How to Handle Complex Furniture Disassembly Safely
Moving day is challenging enough without the added pressure of dismantling large, heavy, or complex furniture.
Whether it’s a wardrobe with sliding doors, a bunk bed, or a modular sofa, disassembling such items requires precision, the right tools, and a lot of care.
At Brilliant Removals London, our team handles thousands of complex furniture disassemblies every year. In this guide, we’ll share step-by-step advice on how to take apart large furniture safely — without losing screws, damaging panels, or risking injury.
Why Safe Furniture Disassembly Matters
When moving, bulky furniture often won’t fit through doors, stairways, or lifts. Proper disassembly:
- Prevents damage to your furniture and property
- Makes transportation easier and safer
- Saves space in the moving van
- Simplifies reassembly at your new home
However, complex furniture — like modular wardrobes, bunk beds, or reclining sofas — comes with added risks. Incorrect disassembly can lead to stripped screws, cracked panels, or missing hardware.
That’s why preparation is key.
Tools and Materials You’ll Need
Before you start, gather everything required. Using the wrong tool can cause costly damage.
| Tool / Material | Purpose |
| Screwdriver set (flathead & Phillips) | For most screws and fittings |
| Allen (hex) keys | Common for bed and IKEA furniture |
| Wrench or socket set | For bolts and metal frames |
| Hammer or rubber mallet | For gentle adjustment |
| Pliers | For gripping or removing stuck fittings |
| Labels and masking tape | For marking parts |
| Ziplock bags | For screws and small components |
| Permanent marker | To label bags or panels |
| Moving blankets | To protect disassembled parts |
Pro Tip: Lay out an old bedsheet or blanket before starting. It prevents scratches and makes collecting small screws easier.
Step-by-Step: How to Disassemble Complex Furniture
Below is a detailed process applicable to most complex items — such as wardrobes, bunk beds, large sofas, dining tables, and modular units.
Step 1: Plan and Photograph Before You Begin
Start by taking clear photos of your furniture from all angles — including the inside of cabinets or under-frame connections.
Why? Because these photos will act as a visual guide during reassembly later.
Tip: Take close-up photos of hinges, bolts, and attachment points. This helps you remember which screws go where.
Step 2: Clear the Surrounding Area
You need space to work safely.
Move smaller items out of the way and ensure there’s a clear path for lifting or rotating panels.
Avoid disassembling furniture near glass doors, windows, or narrow spaces where panels could get damaged.
Step 3: Empty All Contents
Before disassembly, remove all contents:
- Clothes and accessories from wardrobes
- Books or decorations from shelves
- Bedding or drawers from beds
Leaving items inside makes the furniture heavier and unstable.
Step 4: Remove Detachable Parts First
Start small. Detach handles, knobs, shelves, and drawers before tackling the main frame.
| Furniture Type | Parts to Remove First |
| Wardrobe | Doors, shelves, hanging rails |
| Bed | Mattress, slats, headboard |
| Sofa | Cushions, armrests, legs |
| Dining Table | Glass tops, leaves, bolts |
Pro Tip: As you remove each part, label it clearly. Use masking tape with short descriptions such as “Left Door – Wardrobe” or “Top Shelf”.
Step 5: Disconnect the Frame Carefully
For complex items, always follow the reverse order of assembly.
- Loosen bolts and screws gradually, not all at once.
- Support heavy sections to prevent collapsing.
- Keep fittings (screws, bolts, brackets) in separate labelled bags for each furniture item.
| Example Labelling System |
| “Bed Frame Bolts – 8pcs” |
| “Wardrobe Hinges – 6pcs” |
| “Dining Table Screws – Legs” |
Pro Tip: Number panels using masking tape (e.g., “1”, “2”, “3”) so you know the correct order when rebuilding.
Step 6: Protect Panels and Fragile Sections
Once disassembled:
- Wrap wooden or glass panels in blankets or bubble wrap.
- Stack panels vertically — never flat — to prevent warping.
- Avoid taping directly onto polished wood or glass (use wrapping material first).
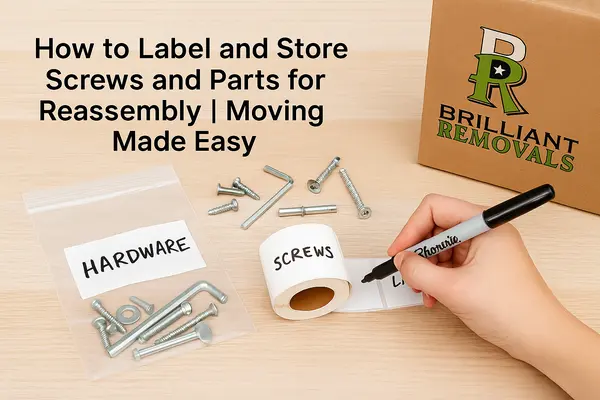
Step 7: Store Screws and Hardware Securely
All small hardware should go into separate, labelled ziplock bags.
Attach the bag directly to the corresponding panel or place them together in a “Hardware Box.”
Pro Tip: Write down where each set of screws came from (e.g., “Side Panel Joints” or “Drawer Rails”). You’ll thank yourself later.
Step 8: Transport Large Parts Safely
Even disassembled furniture can be heavy.
Lift with your legs, not your back, and never twist while carrying panels.
For long items (like bed frames or wardrobe sides), carry vertically to avoid bending or breakage.If you’re unsure, hire professionals with proper equipment like dollies, straps, and blankets — like our team at Brilliant Removals London.
Common Mistakes to Avoid
| Mistake | Why It’s a Problem | How to Avoid |
| Over-tightening screws | Can strip threads or crack wood | Tighten gently |
| Using wrong tools | Damages fittings | Match screwdriver size |
| Not labelling parts | Causes confusion later | Use masking tape labels |
| Rushing the process | Leads to damage | Work systematically |
| Forgetting small pieces | Delays reassembly | Use labelled bags |
Handling Complex Furniture Types
A. Sliding-Door Wardrobes
- Remove doors first — lift off rails carefully.
- Unscrew tracks and runners, label them left/right.
- Remove back panels only if necessary.
Don’t tilt mirrored doors horizontally — they can shatter from pressure.
B. Bunk Beds
- Separate top and bottom frames before removing slats.
- Keep ladder bolts in a separate bag.
- Check if safety rails are detachable.
C. Modular Sofas or Recliners
- Disconnect electrical parts (for recliners) carefully.
- Remove cushions and arms first.
- Label each modular section (“Left End,” “Corner,” “Right Arm”).
D. Dining Tables
- Use corner protectors for wooden edges.
- Remove legs and leaf extensions first.
- Wrap glass or marble tops separately.
Safety Tips When Disassembling Heavy Furniture
- Always have a second person to help with lifting.
- Keep children and pets away from the work area.
- Wear gloves to prevent splinters or cuts.
- Never force parts apart — if stuck, use a rubber mallet or check for hidden screws.
- Avoid disassembling on slippery floors.
Relevant Articles:
How to Disassemble Furniture Before a Move
When to Call Professionals
Some furniture pieces are too heavy, complex, or risky to handle alone.
Call Brilliant Removals London if:
- You have antique or high-value furniture.
- The furniture includes glass panels or built-in mechanisms.
- You’re moving from or to tight spaces like flats or high-rise buildings.
- You don’t have the tools or manpower to handle large items safely.
Our trained movers are experts at safe furniture disassembly and reassembly. We use protective materials, precision tools, and years of experience to make sure your belongings arrive intact and ready to use.
After Disassembly: Organising for Reassembly
Once your items are packed and ready:
- Keep all labelled hardware in a “Setup Box.”
- Store large panels upright against walls in the moving van.
- Unload and reassemble in reverse order — starting with large frames first.
Bonus Tip: Use your earlier photos to double-check alignment during reassembly.
Relevant Articles:
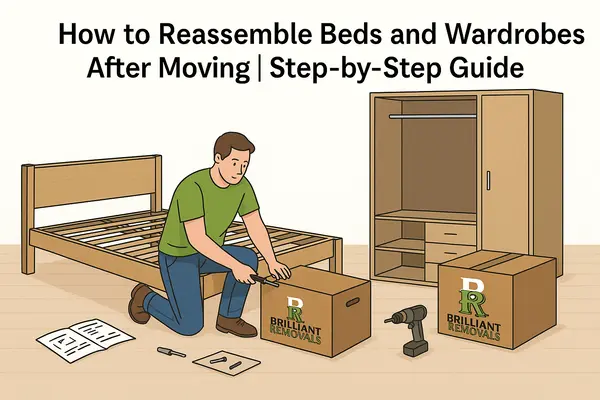
How to Reassemble Beds and Wardrobes After Moving
Summary
Disassembling complex furniture safely is as much about planning as it is about strength.
By preparing your workspace, using the right tools, labelling every piece, and working methodically, you can avoid the stress and mistakes that come with hasty dismantling.
And if you’d prefer peace of mind, let Brilliant Removals London take care of it for you.
Our skilled movers handle everything from packing and disassembly to transportation and reassembly, ensuring your move is smooth, safe, and efficient from start to finish.